CatalogX #
Brief Introduction #
Excited to create a product catalog site of your own? Then what are you waiting for, our plugin CatalogX is here to turn your WooCommerce store into an amazing product catalog. So install our plugin and get started.
System Requirements #
The basic system requirements needed to install CatalogX is described below –
- PHP : 8.0 or higher
- MySQL : 5.5 or later
- WordPress : 5.4 or higher
- WooCommerce : 8.2 or higher
Installation and Activation #
Now that you have your system requirements ready, let’s get started with the installation process. Installing CatalogX is as easy as ABC. Just follow these steps:
- Go to your Admin Dashboard and navigate to Plugins.
- On the Plugins page, click on Add New.
- Search for CatalogX in the Search Plugins section.
- When CatalogX appears in the search results, click on the Install Now button next to it.
- After the installation, click on Activate. CatalogX is now activated on your website!
Alternatively, you can install our plugin by following these steps:
- Download CatalogX from the WordPress.org plugin directory here .
- Go to the Add New section as previously mentioned.
- Click on the Upload Plugin button at the top. Browse to the location of the downloaded file and select the recently downloaded zip file. Then click on Install Now.
Or you can:
- Extract the downloaded zip file to the WordPress plugins folder, which is usually found at: “yourhostname/wordpress/wp-content/plugins”.
- Remember, pushing the extracted file to your plugins folder will not activate the plugin. To activate CatalogX, go to the Plugins section in the admin dashboard and click on Activate under CatalogX.
Note: CatalogX is an extension for WooCommerce. You need to have WooCommerce installed and activated on your WordPress site before using CatalogX.
CatalogX Pro #
In this article, we will guide you through upgrading to CatalogX PRO with a step-by-step process. Here’s how to install CatalogX Pro:
- Purchase a License: First, you need to purchase a license for CatalogX Pro.
- Download CatalogX Pro: Once purchased, download CatalogX Pro from your My Account page.
- Install CatalogX Pro:
- Go to your WordPress dashboard > Plugins > Add New.
- Select Upload Plugin from the drop-down menu.
- Click on Choose File and select the zip file you downloaded.
- Press the Install Now button.
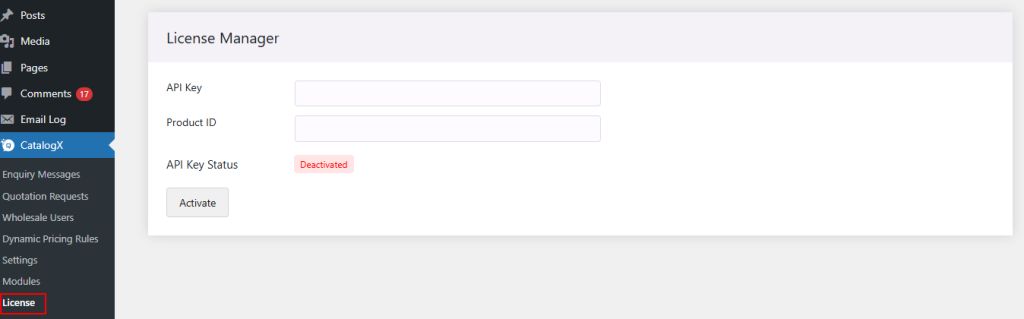
- Activate Your License:
- Navigate to WordPress Dashboard > CatalogX > License.
- Paste the API Key and Product ID copied from the API Key tab on your My Account page.
- Finally, click the Activate button to complete the activation process.
Following these steps will ensure that CatalogX Pro is installed and activated successfully on your WordPress site.
List of Shortcodes #
Check the shortcodes below that can be used for the different buttons and pages of CatalogX and CatalogX Pro.
| Shortcode | Description |
| [catalogx_enquiry_cart] | Display all products in the enquiry cart and send a single inquiry email for all items in the cart. |
| [catalogx_request_quote] | Displays a list of products for which users have requested quotes, making it easy to review all requests. |
| [catalogx_wholesale_products] | Creates a page listing all wholesale products, enabling wholesalers to easily purchase multiple items in one transaction. |
| [catalogx_enquiry_cart_button] | Displays the “Add to Enquiry Cart” button. |
| [catalogx_enquiry_button] | Displays the “Send an Enquiry” button |
| [catalogx_quote_button] | Displays the “Add to Quote” button. |


